
How to Customize Dashboard Page Using Filament Built-in Widgets
Learn how to extend your web application’s dashboard using built-in widgets provided by Filament. This tutorial will walk you through customizing your dashboard page and give you a more dynamic, user-friendly interface. Perfect for developers looking to streamline their projects with powerful, pre-built components.
Filament offers 3 kinds of widgets. They are stats overview widget, chart widgets and table widgets. Lets explore each of them in detail.
You can check out the video tutorial.
Note: If you’re uncertain about how the data is being retrieved or the criteria for displaying the data or actions, you can refer to this YouTube playlist for guidance.
1. Stats Overview Widget
Filament includes a “stats overview” widget template that allows you to showcase various statistics within a single widget. To create a stats overview widget, hit the following command in your terminal.
php artisan make:filament-widget ProductOverview --stats-overviewProductOverview is the name of the widget. Now it will generate us the following file.
<?php

namespace App\Filament\Widgets;

use Filament\Widgets\StatsOverviewWidget as BaseWidget;
use Filament\Widgets\StatsOverviewWidget\Stat;

class ProductOverview extends BaseWidget
{
    protected function getStats(): array
    {
        return [
            //
        ];
    }
}
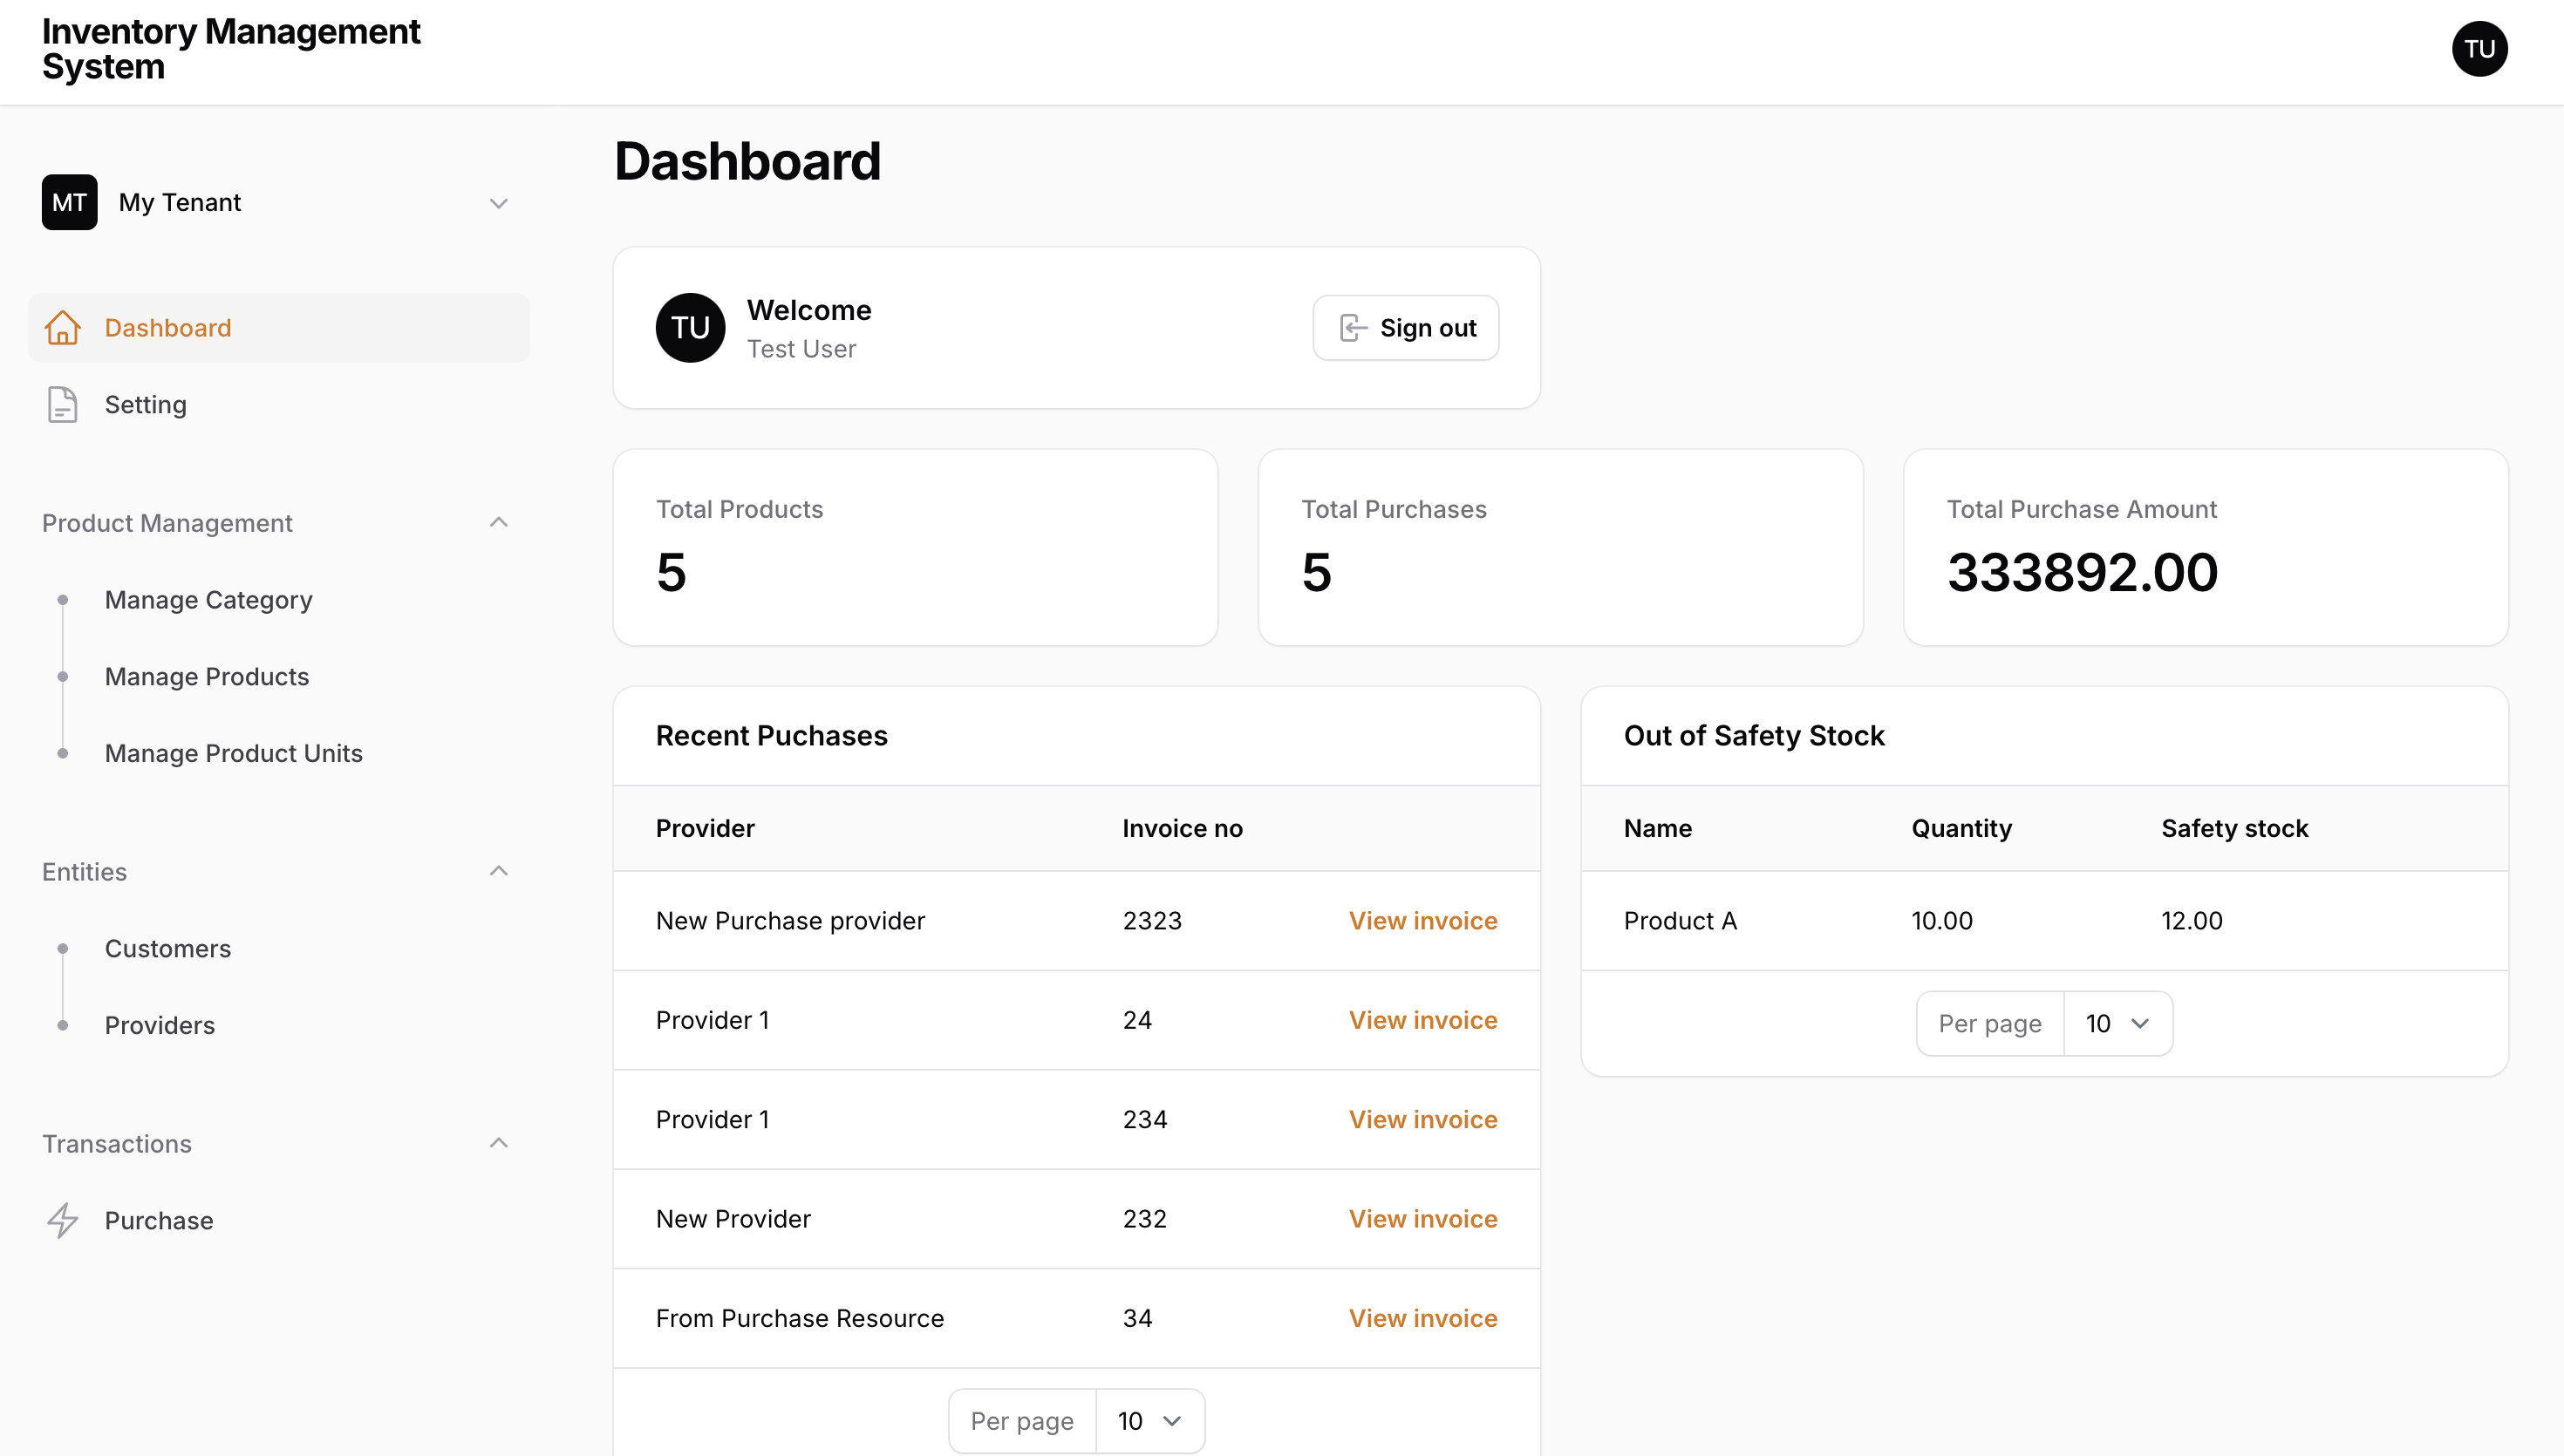
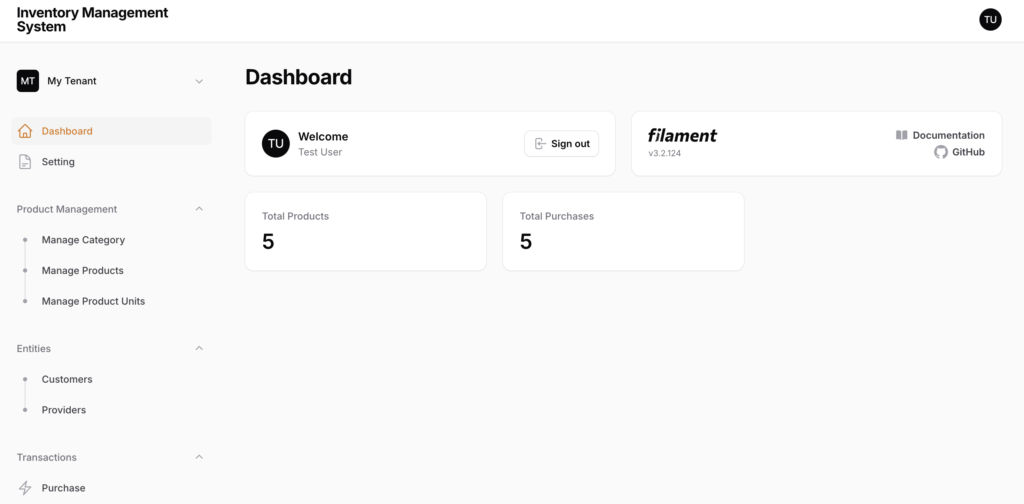
Now, inside the getStats() method, we can return the widget name and value. Lets suppose, we have two models Product and Purchase. So, now I want to show the Total Products and Total Purchases. So, this can be done as following:
protected function getStats(): array
    {
        return [
            Stat::make("Total Products",Product::count()),
            Stat::make('Total Purchases',Purchase::count())
        ];
    }
Then the first parameter we passed is the label and the second parameter is the value. You can also modify more on this like we can add description, descriptionIcon, heading, color and much more. You can follow this documentation for this.
After you have created the widget and save it, it will automatically registered on the dashboard page.
Now, lets move to second type of widget.
Read more articles about filament:
2. Table Widget
This is another kind of widget, similar to the table format of our resource. We can always add this type of widget on the dashboard to show some list, like recent purchases or product out of stock.
So, to create this type of widget just hit the following command.
php artisan make:filament-widget RecentPuchases --tableThe above command will generate the following file:
<?php

namespace App\Filament\Widgets;

use Filament\Tables;
use Filament\Tables\Table;
use Filament\Widgets\TableWidget as BaseWidget;

class RecentPuchases extends BaseWidget
{
    public function table(Table $table): Table
    {
        return $table
            ->query(
                // ...
            )
            ->columns([
                // ...
            ]);
    }
}
Now, here inside the query , we will use our query and inside the columns we can add which columns to show. We can modify it as the table of filament resource.
public function table(Table $table): Table
    {
        return $table
            ->query(
                Purchase::latest()
            )
            ->columns([
                TextColumn::make("provider.name"),
                TextColumn::make('invoice_no'),
            ])
            ->actions([
                Action::make('view_invoice')
                    ->url(function($record){
                        return PurchaseResource::getUrl("invoice",['tenant'=>Filament::getTenant()->id,'record'=>$record->id]);
                    })

            ]);
    }
Here, in the code, you can see ew fetched the latest purchase and added two columns, one is provider name and second is invoice no. Also, we added one custom action which is redirecting us to the invoice page.
Conclusion
So, in this article we have discussed about table widget and stats overview widget. In the next article, we will learn about the charts widget. In the charts widget, we have different types of widgets to discuss.
If you have any confusion or query about this article or anything else, you can comment down below.

I want advance widget like bar charts, scatter chart. Can we add that on dashboard page?
Yes, we are coming with that article. Stay tuned.
This is helpful! Can you also explain how to handle permissions for different widgets so that certain widgets are only visible to specific user roles?
Sure, in every widget, we can override canView() method.
How can I add my own custom data to the dashboard using Filament’s built-in widgets? Are there specific steps or examples you could share?
yes, the above article shows that. Also, if you want different kinds of widgets like bar chart, we are coming with that article.
Thanks for this
Thank you so much for help.