Mastering Laravel Filament’s Import Features
Easily manage large datasets with Laravel Filament import features. This guide describes how to install and use such tools to facilitate bulk uploads, report generation, and increase the overall efficiency of a Laravel application.
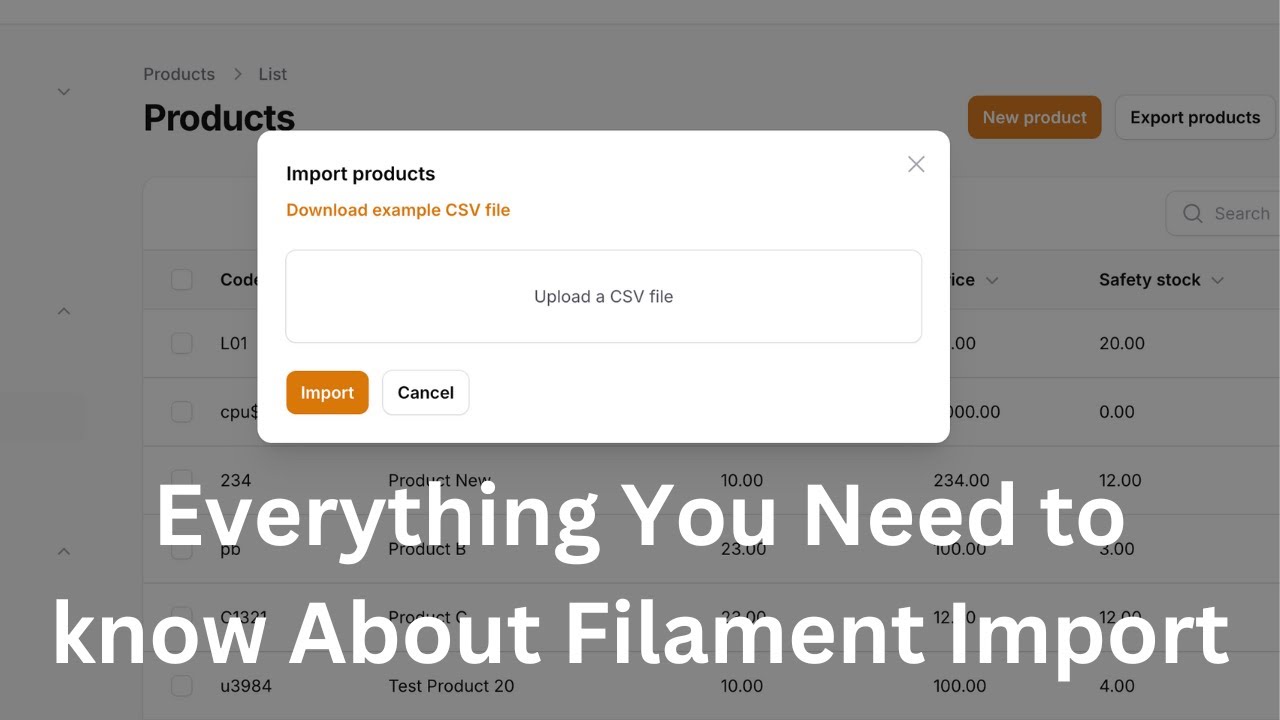
Filament v3.1 shipped with an out-of-the-box action for importing rows from a CSV file. When the import button is clicked, a modal opens asking the user to upload a file. They can then map each CSV column to the corresponding database column. If some of the rows fail validation, they are compiled into a downloadable CSV to review, while the valid rows are imported. The user can also download a sample CSV containing all importable columns for reference.
Check the official docs.
Want to create export functionality. Check here.
Lets follow step-by-step.
Create a Importer Class
To create an action for importing , first we need to have the importer class which will handle the importing of data. So, to add a importer class, hit the following command in your terminal.
php artisan make:filament-importer ProductThis will create a Importer class. The code will look like as:
<?php

namespace App\Filament\Imports;

use App\Models\Product;
use Filament\Actions\Imports\ImportColumn;
use Filament\Actions\Imports\Importer;
use Filament\Actions\Imports\Models\Import;

class ProductImporter extends Importer
{
    protected static ?string $model = Product::class;

    public static function getColumns(): array
    {
        return [
            //
        ];
    }

    public function resolveRecord(): ?Product
    {
        // return Product::firstOrNew([
        //     // Update existing records, matching them by `$this->data['column_name']`
        //     'email' => $this->data['email'],
        // ]);

        return new Product();
    }

    public static function getCompletedNotificationBody(Import $import): string
    {
        $body = 'Your product import has completed and ' . number_format($import->successful_rows) . ' ' . str('row')->plural($import->successful_rows) . ' imported.';

        if ($failedRowsCount = $import->getFailedRowsCount()) {
            $body .= ' ' . number_format($failedRowsCount) . ' ' . str('row')->plural($failedRowsCount) . ' failed to import.';
        }

        return $body;
    }
}
So, in the getColumns method, we need to define the columns that we are importing.So, for product lets say we will have the following columns:
- Name
- Quantity
- Code
- Safety Stock
- Price
Add the columns name to import
So, now we need to add the columns for each of them.
 public static function getColumns(): array
    {
        return [
            ImportColumn::make('name')
                ->requiredMapping()
                ->rules(['required', 'max:255']),

            ImportColumn::make('code')
                ->label('Code')
                ->requiredMapping(),

            ImportColumn::make('quantity')
                ->label('Quantity')
                ->requiredMapping(),

            ImportColumn::make('price')
                ->numeric()
                ->rules(['numeric', 'min:0']),

            ImportColumn::make('safety_stock')
                ->label('Safety Stock')
                ->requiredMapping(),
        ];
    }
Now, the above mentioned are the columns that will be imported.
Customize the creation process
After we added the list of columns , we can customize how the data is created. For that we can use the resolveRecord() method.
  public function resolveRecord(): ?Product
    {
        return  Product::create($this->data);
    }
For now , i am directly creating the records. You can customize on your own record.
Create a Import Action
So, to create an import action , we will goto to ListProduct page and add an action there on the array of getHeaderActions().
ImportAction::make()
                ->importer(ProductImporter::class)

Now, the basic import should work. Let’s dive into the advance part.
1. Validating Input Field.
For validation of any field we can chain the rules() and add an array of rules or a custom rule on it. For example, lets say we want to make product column to be required and its maximum length can only be 100. Then we can do like this:
ImportColumn::make('sku')
    ->rules(['required', 'max:100'])
2. Importing Relationship.
You can import a relationship using the relationship() method, but for now it only supports BelongsTo relationships. For example, if your CSV has a category column you might want to import the related category relationship:
use Filament\Actions\Imports\ImportColumn;

ImportColumn::make('author')
    ->relationship();
In this example, the author column in the CSV will map to the author_id column in the database. The CSV should contain the primary keys of the authors, usually the id.
If a value exists in the column but the selected author does not exist, the import will not validate. Filament automatically validates all relationship columns to be not empty if required.
If you want to find a related record using a different column, you can pass the column name as resolveUsing
use Filament\Actions\Imports\ImportColumn;

ImportColumn::make('author')
    ->relationship(resolveUsing:email);
Conclusion
So, in this way, we can create an import action on filament admin panel and modify it on the basis of our use case. If you have any confusion , please comment down below or you can email me.
GITHUB REPOSITORY
If you want access to the current repository , please comment down below with your email. I will just add you as a collaborator. You can also directly email me.
Thanks
I would like the repo.
Could you share your github account username?
can i get github repo?