Efficiently load tenant-specific settings and purchase data in Laravel Livewire using the mount method, with caching for optimal performance
In the previous article, we created a multi-tenant settings functionality. Now, in this article, we will use those settings to customize the invoices and branding – appearance of our panel based on the tenant’s panel.
Check out the video tutorial of Part 1:
Check out the video of this article.
Lets follow step-wise-step process.
1. Create a helper function
I have created a file inside app/Helper/helpers.php
if(!function_exists('getSettings'))
{
    function getSettings(array $columns,$tenantId)
    {
        $finalResult = [];
        $settings = Setting::whereIn('key', $columns)
            ->with(['settings' => function($query) use ($tenantId) {
                $query->where('tenant_id', $tenantId);
            }])
            ->get();
        foreach ($columns as $column) {
            $setting = $settings->firstWhere('key', $column);

            if ($setting) {
                $tenantSetting = $setting->settings->first();
                if($setting->type == "file")
                {
                    $finalResult[$column] = $tenantSetting ? asset($tenantSetting->value) : asset($setting->value);
                }
                else
                {
                    $finalResult[$column] = $tenantSetting ? $tenantSetting->value : $setting->value;
                }
            } else {
                $finalResult[$column] = '';
            }
        }
        return $finalResult;
    }
}
It expects an array of columns representing the settings keys the user wants to retrieve. It checks first if there are user tenant-specific settings. If it finds any tenant-specific setting, it adds that value; otherwise, it falls back to the default setting. It returns a key-value pair array of the settings keys and their corresponding values.
2. Register the helper function in composer.json file.
Now, just inside the autoload , add the following code:
"autoload": {
       .....
        "files":[
            "app/Helper/helpers.php". // it should be your path to helpers.php file
        ]
    },
.....
3. Run the composer dump autoload command.
Just open the terminal and hit the following command.
composer dump-autoloadNow, our helper function is ready.
4. Let’s Modify our Invoice Comoponent file.
You can checkout our invoice page in this tutorial.
   public $settings;

    public function mount($record)
    {
        $this->record = $record;
        $this->purchase = Purchase::with(['provider','products'])->find($record);
        $this->settings   = getSettings(['Tenant Name', 'Address','Logo'],Filament::getTenant()->id);
    }
I have created one public variable and when the component is mounted, it will fetch the related settings from the helper functions.
5. Lets modify our Invoice Blade file
...
 <td style="text-align: right;">
                <h2 style="font-weight: bold; color: #4a5568;">Company</h2>
                <p style="color: #718096;">{{ $settings['Tenant Name']}}</p>
                <p style="color: #718096;">{{ $settings['Address']}}</p>
                <p style="color: #718096;">City, State, ZIP</p>
                <p style="color: #718096;">Email: info@company.com</p>
            </td>
.....
That’s it, it will work for both our invoice view page and invoice pdf page.
Here is the video of printing invoice.
So, if you have any confusion or queries regarding this, you can comment or email me. Thank you guys.
Don’t forget to check out the official docs of filament.
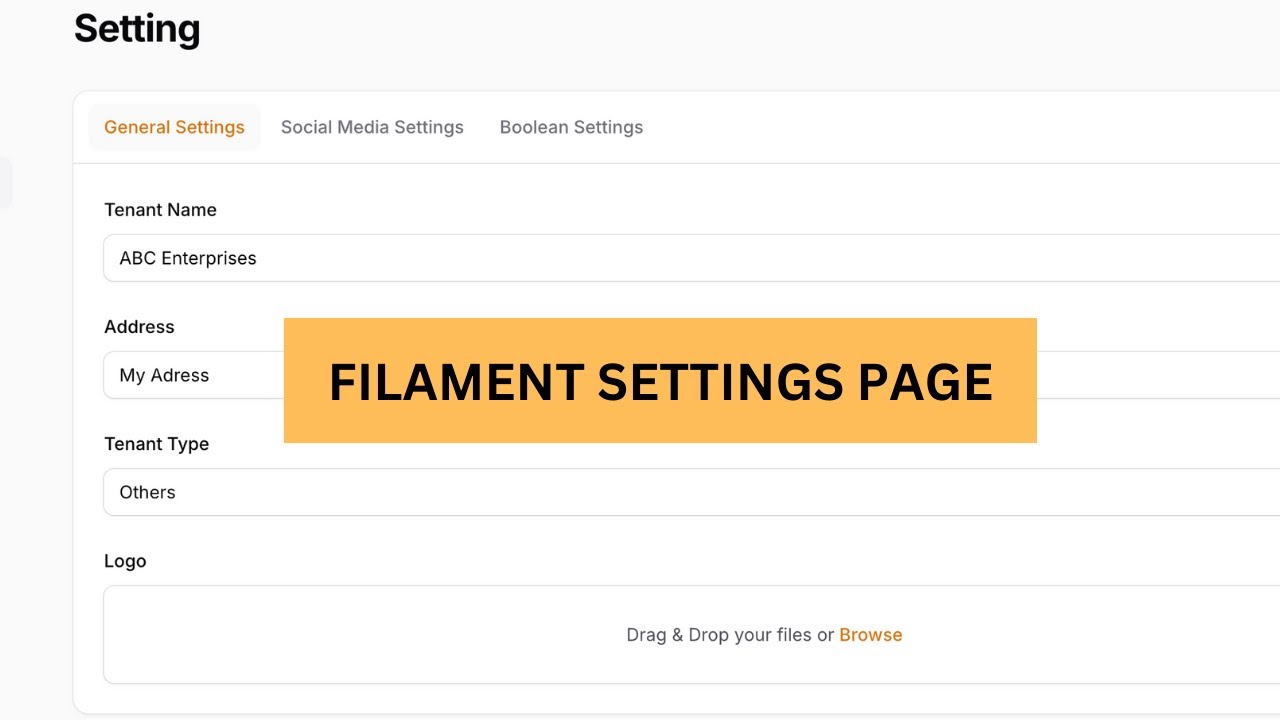
[…] So, for the from bill part meaning filament settings part. Please check this article. […]